Music Everywhere
As with everything, it’s always about the amount of time and money you’re willing to put in, in order to get what you want.
I like music, and as someone that has a few computers around the house, coupled with a Vista Media Centre - I want to be able to have access to mood altering music throughout.
My music application of choice happens to be iTunes™. Understandably it isn’t everyone’s favourite, and I must admit - it does seem very sluggish on Windows™ compared to its OSX™ counterpart.
The point of this post is to setup streaming of music to iTunes™ utilising mt-daapd [aka Firefly], Ubuntu, VMWare and obviously the mp3’s themselves - hosted on a Windows™ share.
Many people will have a ‘server’ of some sort, be it for the hundred of gigabytes of family photos and videos, a common repository for house mates to exchange files or simply in my case - all of the above.
I have a server that runs Windows™ 2003 Server. My laptop synchronizes with it every time I dock it, thus providing me with a cheap NAS-like solution for my photos, university lectures and assignments.
Also, since Internet radio is something else I like to dabble in, and my ISP providing me a nice list free from bandwidth charges - and ultimately wishing to purchase a Wi-Fi enabled radio streamer, I decided to enable streaming of music across my house.
You might be asking your self - why am I running a VMWare Server + Linux in order to just stream music held on a Windows™ share? Well there are alternatives, and apps such as Tangerine that will run quite happily on Windows™ itself and serve music - but I do not want to run anything that isn’t necessary on the server itself - I prefer to leave it to virtual machines, as it allows for a much quicker re-deployment, coupled with the fact that I need a few other services to run on the VM for the network.
So here’s a guide on how to get streaming mp3’s with the use of mt-daapd, linux and about 30 minutes of spare time.
I will use names for usernames and server configurations that I have used, change as needed.
On the Windows box
- Create a username “buntu” [assign a password]
Create a directory which will host the root of your music. So if it’s present in H:\Backup\Files\Personal\Music, then share and make sure you share Music, thus it will be accessible via \quack\music [quack is the name of the server]
- Make sure the security as well as the sharing settings allow for “buntu” to have ‘read-only’ access
Download + Install VMware Server
Download Ubuntu Desktop/Server [or a distro of your choice - I will only run through Ubuntu, as it’s based on my farourite Debian, only prettier + more user friendly]
- I recommend you download the *alternate* ISO, ubuntu-7.04-alternate-i386.iso as with VMWare server, you can get a “no screens found” error, and the alternate install will merely remove the GUI whilst installing Ubuntu.
If you’re creating the VM - 2 things.
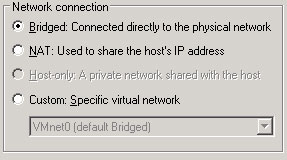
- When you’re going through the ‘New Virtual Machine Wizard’ - make sure you select “Use Bridge Networking”, as that way you’re making it easier for your new virtual machine to have access to the current network and thus the network shares on another computer.
- Hard drive space allocation - if you’re going to be using this for something other than just streaming, and have other services in mind for this VM - such as perhaps a dedicated development environment, you might consider giving it more than the default 8Gb.
On with it.
Assign the ISO you download as the CD drive.
As I mentioned above,
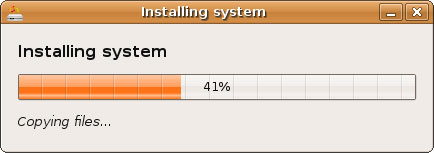
Proceed through the menus and install Ubuntu, for most - just accept the defaults.
Optional
In order to have the VM start when the host boots up, select the appropriate options after going to the VM Settings and under the Options tab - you will see - “Startup/Shutdown”, with the respective options being now open to you on the right hand side.
Then
apt-get install smbfs
mkdir /music
mount -t smbfs -o username=buntu //quack/music /music
password:`
- The above should go through, if you have all the permissions set up correctly.
- Now you have to make sure it is mounted on boot. Edit the /etc/fstab and append the following:
note the space between the source and the mount point
//quack/music /music cifs username=buntu,password=music,user 0 0
A quick check:
mount /music
ls /music
Should return no errors, and you will now have /music mounted each boot.
Time to set up the streaming.
apt-get install mt-daapd
/etc/init.d/mt-daapd start
Now if you installed something with X, launch your browser of choice [firefox], and point to: http://localhost:3689 (Default username:password -> admin:mt-daapd)
or
alternatively modify the /etc/mt-daapd.conf manually
Here you are able to specify any parameters as well as monitor who’s leeching [scratch] listening to your music.
At the very least, I recommend you modify (under Configuration on the site):
- Server Name [as per the file itself - ‘the stuff that comes up in iTunes’]
- Admin password [used to log into the the site]
- Music Folder, set it to ‘/music’
- Hit ‘Save’
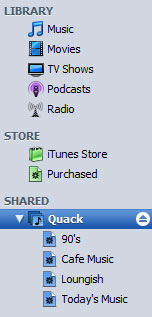
Now on the status page, hit ‘Start Scan’ - and you’ll see the little counter for ‘served’ increase quite rapidly. Any iTunes™ instance on the network, will be able to see Quack under shared music.