Configuring NAT on ESX and ESXi
ESX doesn’t have NAT inbuilt, so here’s how to configure it with the help of a VMware appliance called pfSense (an Open Source firewall/router).
There are three components in this setup:
- Host
- router/pfSense
- NAT Client
Host
A great read for beginners and those refreshing is the VMware Virtual Networking Concepts whitepaper
Now lets create a network that our NAT’ed VMs will be using.
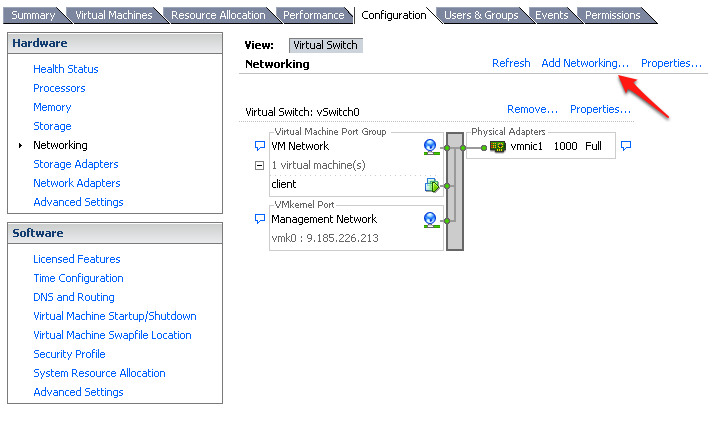
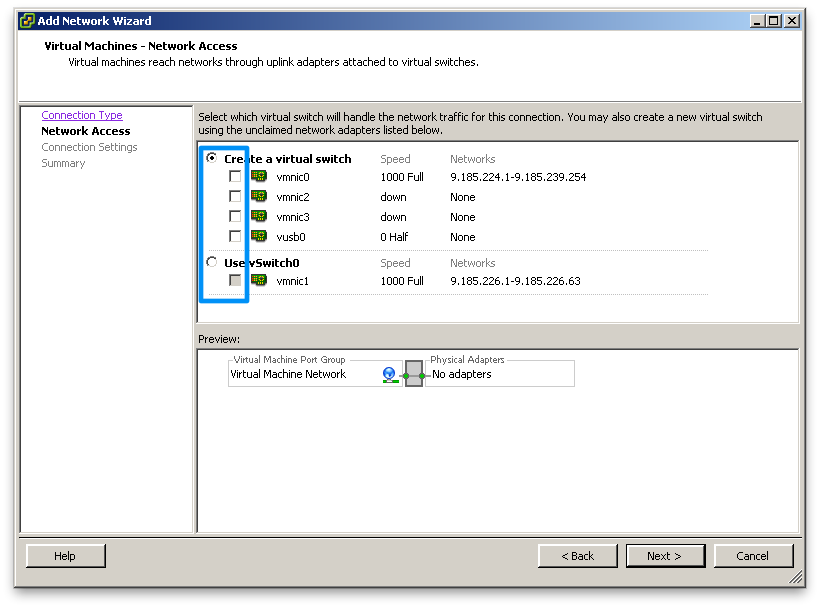
When prompted under Connection Type, select a ‘VM Network’, as this is for the typical traffic within the Virtual Machine (not IO or management of your machines).
Lets create a vSwitch that doesn’t connect to anything, a dud, a blankie. This will be our NAT’ed environment. It’s quite important that you DON’T connect a network card to this vSwitch to prevent any inadvertent DHCP leakage. Make sure you have nothing selected.
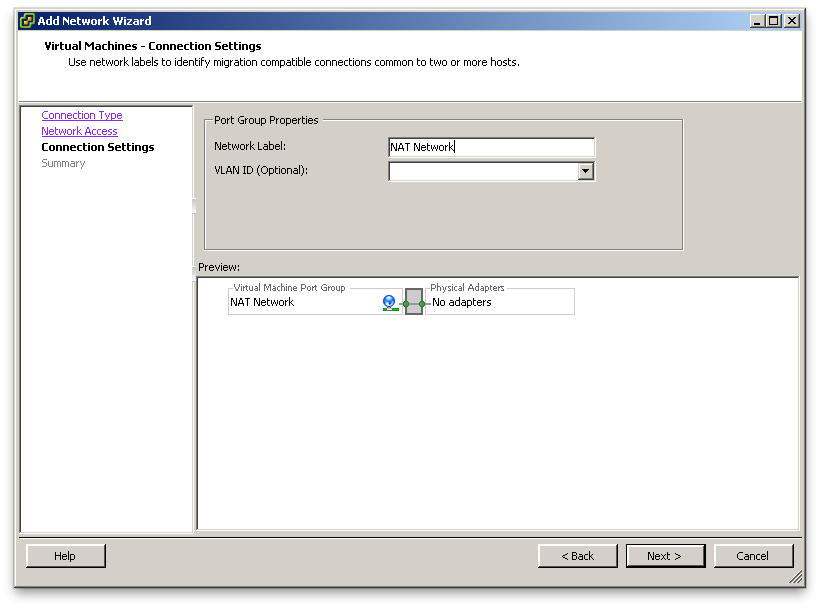
Give it a name to differentiate.
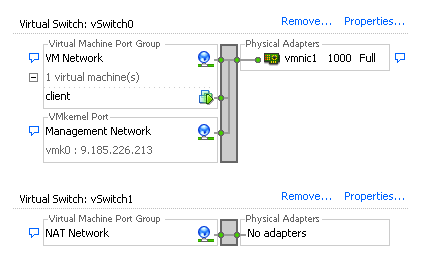
Once you’re done, click finish and you will have something two network available to your VMs:
- VM Network
- NAT Network
Time to setup pfSense. Once you’ve downloaded and extracted it. You have the option of either copying it directly to your datastore and then adding directly to inventory, or importing via the Standalone Converter. I find the latter is always faster.
router/pfSense
Incase you’re converting pfSense first (like I did whilst re-doing it for this post), I recommend you disable the network interfaces until you’ve finished setting up the host networks. We’ll enable these in a later step.
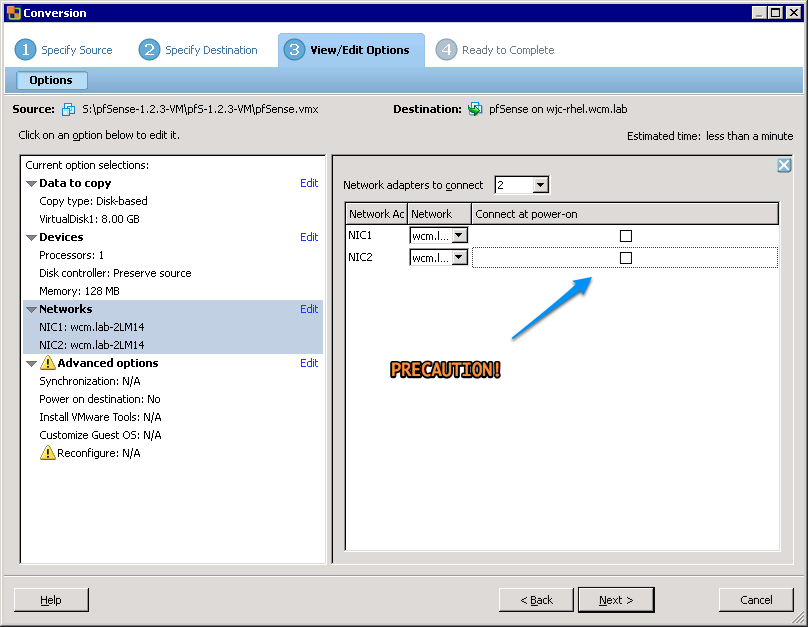
Once the conversion is complete, time to configure our virtual router. pfSense is provided with two NICs out of the box. One for the WAN interface (which is your internal LAN), and one for ‘its’ LAN - the one on which it will be servicing DHCP requests.
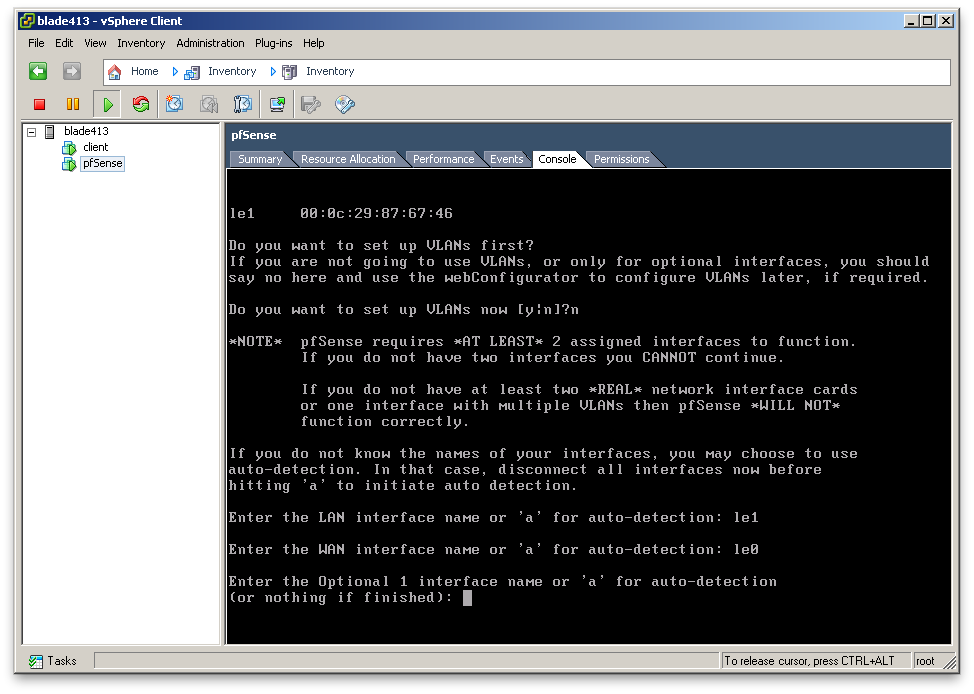
Mark down the last 4 digits of the MAC address, these will help to validate the following step.
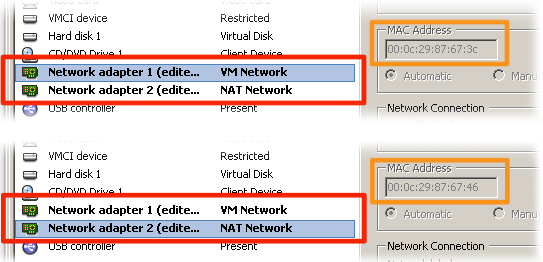
Start the pfSense VM. You will be guided through the mapping of the interfaces, and just to make sure - check to see the MAC addresses matching to the VM Network (in my case 67:3c) and NAT Network (67:46).
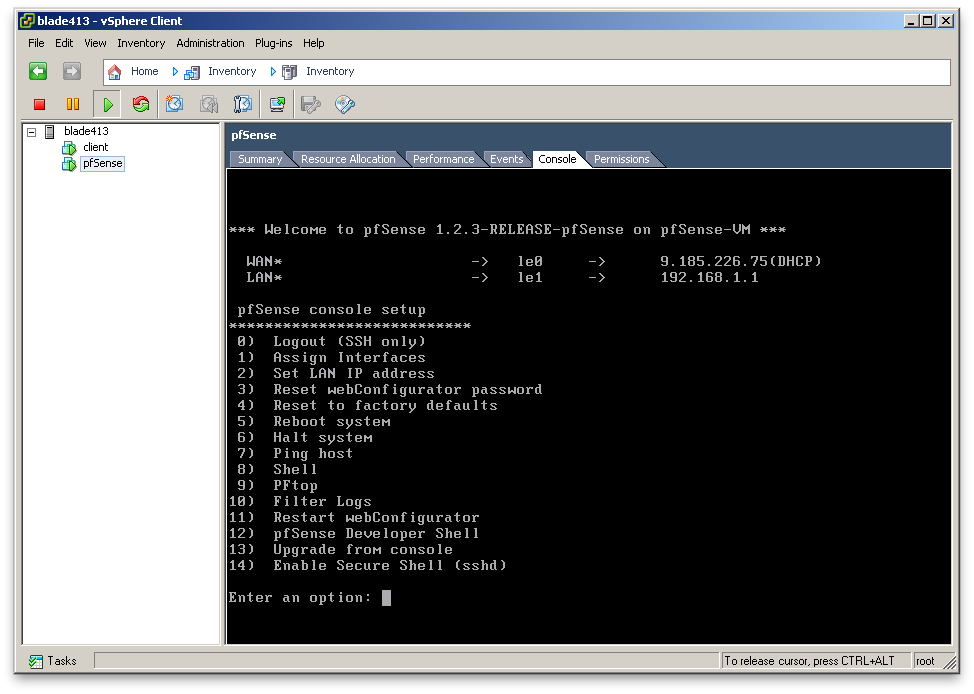
Upon following the wizard, and if you’ve followed everything accordingly (or rather I documented the steps properly) you will be shown the interfaces within pfSense, their mapping (WAN vs LAN) and IP addresses.
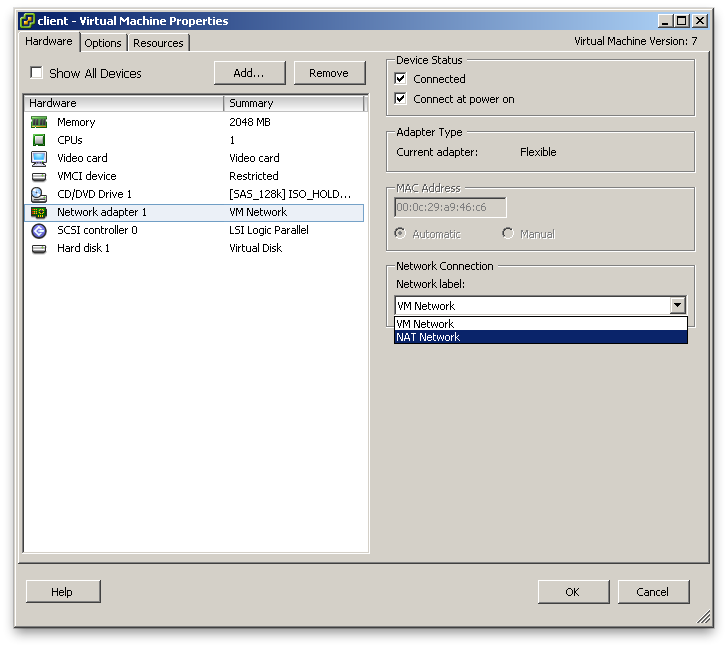
NAT Client[s]
You are now ready to assign clients on this host to the NAT Network and have them pick up addresses dished out by your shiny new appliance.
The whole setup takes just under 5 minutes from start to finish to complete.